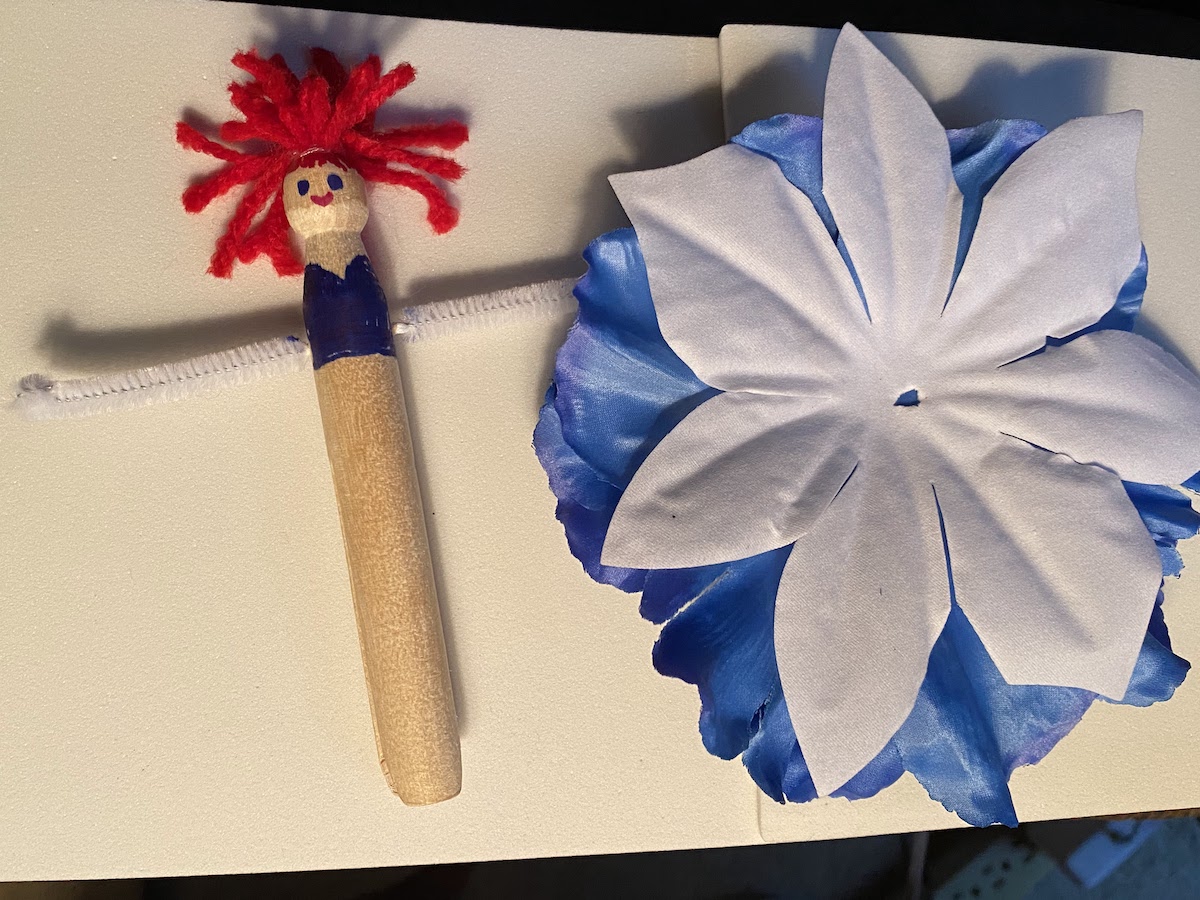
It’s hard not to love fairies. Here’s how to make your own fairy with just a few simple and inexpensive materials. They are so much fun which is why there are awesome festivals and gardens dedicated to them. If you’re looking to bring a little magic home, we have a fun craft for the kids. Here’s a quick and easy way to make your own fairies and not break the bank. Dollar Tree is our favorite craft supply store.
Materials
Things you will need and probably already have at home
BIG BOOK OF EDUCATION ISSUE 2023
MORE FROM THIS ISSUE
The following steps are for a fairy that kids will actually play with and include provisions to make the fairy more durable.
- Prep Fairy Body
You’ll need to decide how you want your fairy to stand. If you are hanging her from a pot or some other object, turn the clothespin with the slit facing to the side and drill a small hole about ½ inch from her neck.
- Make Arms
Push the pipe cleaner through the hole. Trim the pipe cleaner to the desired length of her arms. Leave a little extra pipe cleaner so that you can fold it over making it look like she has hands plus it will keep the wire from poking anyone.

- Draw a Face
With the markers add two dots for her eyes and draw on a smile. We added some lines on the top of her head to help fill in her hair. Use a pencil to test mark the spots you want to make permanent.

- Add Hair
Make continuous loops of yarn for her hair. Make ten continuous loops about 1 ½ inches long each loop. Tightly tie the loops together in the middle. We even used a little of the wire to wrap around the loops to keep her bun from falling apart. With the glue gun, put a few drops of glue on the top of her head and then separate the strands apart so that you can firmly press the yarn down to the knot you created in the middle of the yarn. After the glue is dry you can decide if you want to keep the loops of hair, or cut the bottom loops so that they are individual strands of hair. Draw on a few more strands of hair with a marker if you like.

- Make Her Wings
Using a quarter of a sheet of foam paper, fold the paper in half, draw the shape of wings you want and then cut them out. Add a few drops on the back of the fairy and press the wings onto the body. We threaded the fine wire through the wings and around her neck three times, so that it looks like she has a necklace. This helps hold the wings in place.

- Add Her Dress
Pick your favorite silk flower and take it apart by stripping the flower off of the stem. Keep the opening around the center of the flower as small as possible. You want a tight fit. Draw on the top of her dress. We like using a sweetheart neckline. Using two layers of petals, slid the petals from the bottom of the clothespin up to just underneath her arms. Add drops of glue around the top of the petals.

- Bedazzling
Add glitter, or stick on jewels to some of the petals of her dress, and/or her wings. And then your fairy is ready to join the party.